Port forwarding is a method used in computer networks to forward traffic from a specific port on one network device to another port on a different device. This is often used to allow access to services or applications located behind a router or firewall from external networks.
To set up port forwarding on a Teltonika router, please follow the steps below.
Log in to the router.
Set up DHCP Server
Please ensure that the device behind the Teltonika router uses the Teltonika router as the default gateway so that it obtains the IP from the Teltonika router. You can achieve this by allowing the device behind the Teltonika router to obtain the default gateway automatically or by storing the IP of the Teltonika router as the default gateway.
The DHCP server on the Teltonika router is activated by default. You can check the DHCP server under Network ⇒ LAN
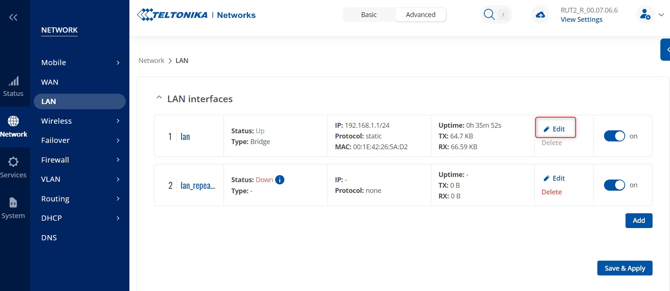
You can access the settings via "Edit". Under "General Settings", scroll down to "DHCP Server"
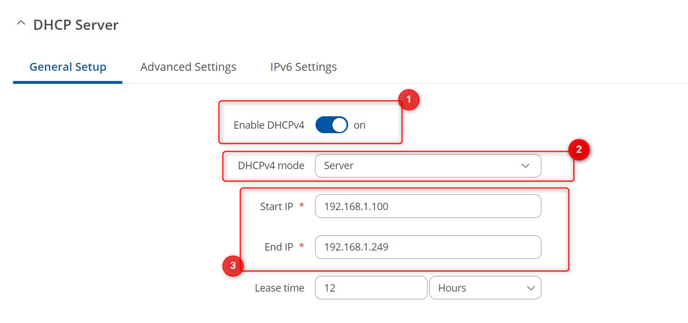
(1) Activate or deactivate DHCP server
(2) select the "Server" mode under "DHCPv4 mode"
(3) If necessary, adjust the start and end IP. The IPs are assigned to the devices connected via LAN cable from this IP range
Set up Port Forwarding
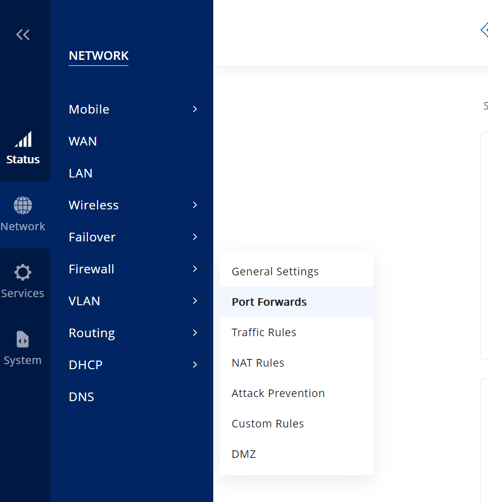
Navigate to the menu item Network ⇒ Firewall ⇒ Port Forwards
Scroll down and add a new rule:

(1) Name: name of the rule
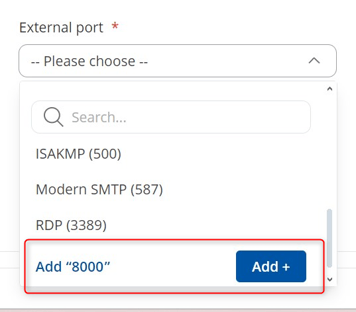
(2) External Port: This is the port via which you can reach the Teltonika router. This port is forwarded to the internal port and the target IP (internal IP). Please use a port greater than 1024 (e.g. 8000), as many ports below 1024 are already used by standard applications (e.g. port 443 for HTTPs). If possible, do not use port 80, as this will exclude you from the web interface of the Teltonika router if remote access via HTTPs is not activated.
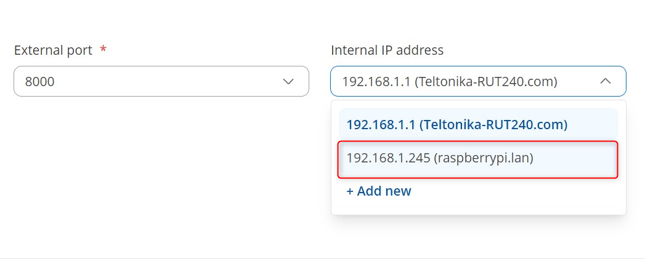
(3) Internal IP address: IP address of the target device
(4) Internal port: the port via which you want to reach the target device. For example, port 80 or 443 if you want to reach the web interface of the target device.
(5) Add: Add or save rule
To define the external port, scroll to the bottom, click on "Add" and enter the port. The port entered is accepted with "Add+".
The Teltonika router recognizes the connected target device and you can select it. If the target device is not recognized, the LAN connection is displayed instead.
Select the destination port, in this example port 80, or scroll down and add your specific port:
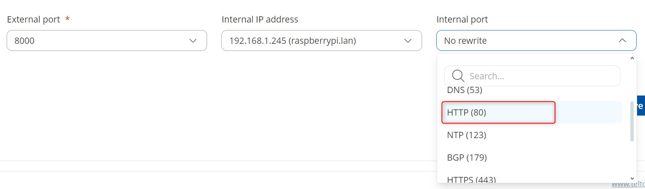
Click "Add" to add the rule.
In this example, port 8000 is forwarded to port 80 of the target IP 192.168.1.245.
If the Teltonika router has the IP 10.1.8.8, for example, you can access the device behind the Teltonika router by entering the router IP and the port (IP:port). The entry looks like this: http://10.1.8.8:8000
If you want to operate and reach another device behind the Teltonika router, you must create another rule. Under "Internal IP address", enter the IP of the 2nd device (e.g. 192.168.1.240) and use a different external port than the 1st device, for example port 8001. You can therefore use the selected port to control which device you want to reach behind the router.